Hotspot looks and presets: which setting changes what
Hotspot Preset, Hotspot Preset Filter and Icon Pack are three different things. Where each one is, what it changes, and how to save your own.
Guide5 min read Updated
On this page
The short answer
Three things are called a preset or a look, and each lives in its own place:
- Hotspot Preset is on one hotspot, in the Hotspots tab (in the Advanced view). It saves that hotspot's Color Override and Variant so that other hotspots can get the same.
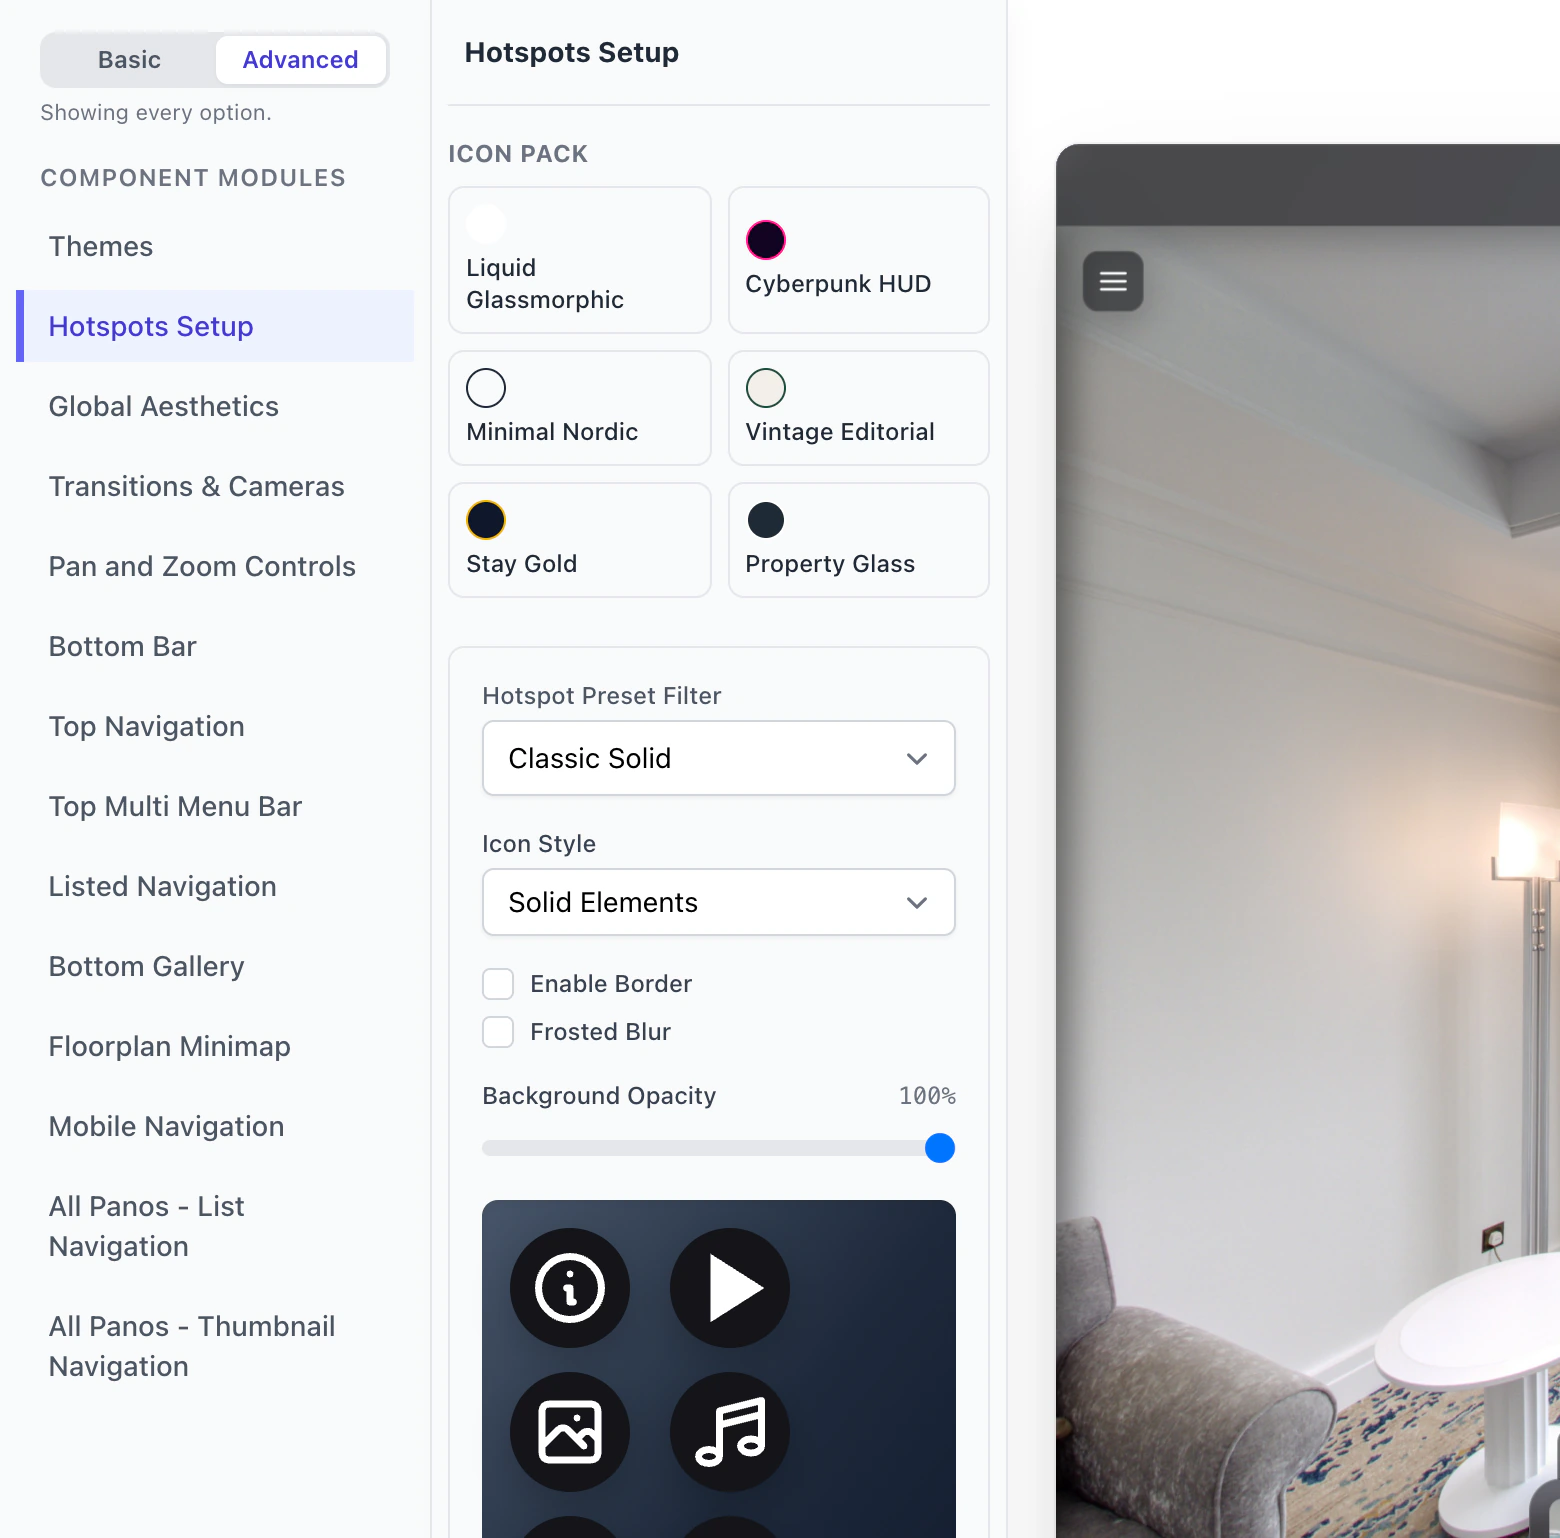
- The tour-wide look is in Hotspots Setup on the Design tab (in the Advanced view). It styles every hotspot in the tour: style, size, hover and animations. Its Hotspot Preset Filter picks a ready-made bundle of settings.
- An Icon Pack sits at the top of Hotspots Setup. One click sets the colors, blur, hover effect and the five hotspot icons for the whole tour.
The presets you save are one list for each person. Both places show that list, but a preset only works in the place where it was saved.
Give a few hotspots the same color and variant
Who can do it: the owner, and Editors and Admins by default (the Hotspots tab). Color Override and Hotspot Preset are in the Advanced view.
- Open the Hotspots tab, select a hotspot and set its Variant and Color Override.
- In Hotspot Properties, under Hotspot Preset, click Save Current.... In Save Hotspot Preset, leave Preset Action on Create New Preset, type a Preset Name and click Save Preset. The hotspot is linked to it.
- Select another hotspot, open Apply an existing preset... and choose the preset. Its color and variant are copied and the hotspot is linked.
A linked hotspot shows a card with the preset's name and Version N. Update Available (vN) with Sync Style appears when the preset has been overwritten since, and nothing changes until you click it. Customized Overrides with Reset to Preset appears when you changed the hotspot's color or variant. Detach keeps the styles and ends the link. Save/Save As... overwrites the preset, which raises its version, or saves a new one.
Change the look of every hotspot
Who can do it: the owner, and Admins by default. Save & Render also needs the Settings tab, which Admins have.
Open the tour's Design tab, click Advanced at the right end of the tab row, and click Hotspots Setup. The panel is in the Advanced view, which shows all its controls. The row of sample hotspots in the panel shows each change at once.
| Control | Choices | Default |
|---|---|---|
| Icon Style | Solid Elements, Line Elements, Legacy PNG | Solid Elements |
| Hotspot Size | Small, Standard (Default), Large | Standard (Default) |
| Hover Effect | 11 choices, from None to Radiating Pulse. Shown only on devices that can hover | Enlarge (Scale Up) |
| Idle Animation | None, Attention Ring, Gentle Float, Slow Breathe. It stops for visitors who ask their device for less motion | None |
| Hotspot Preset Filter | Five ready-made looks, Custom..., and your saved presets under My Presets | Classic Solid |
| Enable Border, Frosted Blur, Background Opacity | A border, a blur behind the badge, and the badge's opacity | Off, off, 100% |
| Entrance Animation | None, Fade In, Pop In | None |
The five ready-made looks (Classic Solid, Classic Bordered, Modern Line, Glassmorphism and Marzipano Original) each set Icon Style, Background Opacity, Enable Border and Frosted Blur together. If you change one of those four controls by hand, the filter switches to Custom.... With Legacy PNG, a Simple Tooltip hotspot opens as a panel when clicked.
Click Save & Render when you are done, and Publish Changes too if Draft Workflows is on (my changes do not show). A hotspot's look is part of a theme: on a Free plan, visitors see your look on a tour in a free theme, the Default Theme, and the free Default look on a tour in a Pro theme that has never been hosted.
Save your own look
- In the Advanced view, set the controls and choose Custom... in Hotspot Preset Filter.
- Click Save Preset. In Save Custom Hotspot Preset, type a Preset Name and click Save Preset. Once you have a saved preset, Create New and Overwrite Existing let you choose.
- The preset appears under My Presets, and choosing it applies it. Delete, shown while a saved preset is selected, removes it after
Are you sure you want to delete this preset?. Tours keep the look they already have.
A saved look keeps the style, border, blur and opacity settings, Hotspot Size, Hover Effect, Idle Animation, the five icon choices and the hotspot color, but not Entrance Animation. Applying it copies those values into the tour.
Icon packs and themes
An Icon Pack sets the colors, blur, hover effect and icons in one click and replaces what you had chosen for them, your own icons included (custom icons). Applying a theme from the Themes panel replaces the look in the same way. The packs are the platform's and your own: to make one, open the Design Hub from the Dashboard, go to Design Sandbox and click Save Icon Pack.
Troubleshooting
My hotspots are black, or do not move, in the editor. The Hotspots tab draws them plain. Switch on Show as in Theme (in the Advanced view) for the colors. Its animations play in the Design preview and the Preview tab.
A control is missing. Hotspot Preset Filter, Entrance Animation and the icon lists are in the Advanced view, and so are Hotspot Preset, Color Override and Show as in Theme on the Hotspots tab.
A card says Deleted Preset, and I did not delete it. The preset was saved by another person. Each person sees only their own presets.
Next steps
Was this article helpful?